how to carpet open tread stairs
Of all of the options available to you, a machine-hemmed, prefabricated stair runner is the most convenient choice for easy installation. After padding each tread, lay the carpet between your pencil marks and press it into the steps with a carpet kicker. The process of laying carpet may appear challenging for first-time installers, but it is possible to install a carpet runner on open stairs in one afternoon. Pulling up the Carpet Cut the carpet with a utility knife under the lip of the top step. You agree that BobVila.com may process your data in the manner described by our Privacy Policy. Attach metal material in the open riser areas of each step, if you desire, but check to ensure that the metal will fit ⦠My false tread/trim piece is about 3/4", it is a hardwood piece that I made. Cut your tack strips into lengths that are four inches shorter than the width of your chosen runner, then count out two strips for each stair. Your classy, comfy stairway is ready to make its grand entrance at your next celebration. Make certain that the strips angle in toward each other, so that the points of the tacks will come close to touching. Lean on the front knob of the kicker with one hand, and use the other hand to keep the kicker's shaft level. Take the individual treads off the metal staircase then either stick or staple the underlay all round the step. Most fitters start from the top, purely because it is easier (you can hold the roll in your knee area). It’s the best of both worlds! Please help us continue to provide you with our trusted how-to guides and videos for free by whitelisting wikiHow on your ad blocker. Finally, trim any excess carpet from the bottom of the steps using a carpet knife. Run a small bead of seam sealer or ⦠However, keep in mind that a spiral stair will offer a little more difficulty to cover smoothly than a traditional straight stair would. You can see here how nice and finished it looks already and the caulking seams will not be that bad at all. Often, these types of stairs arenât carpeted at all, but if you do want to cover them, youâll need at least 20 inches of carpet, plus two times the height of the step, to wrap all the way around. Good padding is worth the investment, because it can extend the life of the carpet on this highly trafficked corridor. I layered 2 pieces of 7/16â³ OSB, cut to fit the stair, and glued and screwed those together and to the old trimmed tread. To create this article, 15 people, some anonymous, worked to edit and improve it over time. Is it OK to hammer the tack nails down if they're sticking up through the rug? Accidentally stepping on one of them can lead to horrible consequences, so it's a good idea to get the padding down as soon as possible. Copyright © 2020 Acton Media Inc. All rights reserved. Showcase the beauty of wood stairs without sacrificing the comfort of carpet with this clever compromise: a carpet runner. Jan 16, 2012 - Idea for safety on open staircase plan - carpet wrapped around each stair. Then, pull the padding tight around the stair nosing and staple it underneath (onto the riser), again spaced every three inches. "Very detailed, printable with pictures, more involved than I thought it would be. There is a 5x7 carpeted landing. For a curved staircase that is open on one side and contains 12 cap pie stairs (without a bullnose stair), you would need 12' x 10' of carpet. Once you have selected your carpet and measured and prepped your stairs, you are ready to begin installing your new carpet. Then, secure the runner to the riser just beneath the next tread with staples, spaced roughly three inches apart. This narrow rug runs down the center of the staircase, leaving some wood exposed on each side of the tread while still providing all the benefits of carpet, such as additional grip, shock absorption, and noise reduction. Itâs essentially like a stair runner. This is because of the curves in the surface. Kick back and relax now that the work is done. Stairs. In addition to the fact that this enhances the presentation of the carpet and guarantee legitimate wear, however, it additionally keeps you from seeing between the âtreadsâ of fiber when you twist the carpet. Mar 26, 2020 - Explore Gizella BooChin's board "OPEN STAIRCASE IDEAS" on Pinterest. Floating Stairs. Carpet installation on open stairs is similar to that for closed stairs. Explore. Pre-hemmed runners are usually sold in one of a few widths, most commonly 27 and 32 inches, so choose the one that fits your tread size with as much (or as little) wood showing as desired. April 2020. This hemming process requires a special sewing machine used by carpet professionals, so you’ll need to hire a pro and provide full measurements (see Step 3) for a custom cut. Secure one end of the pad just in front of the tack strip on the tread, using a hammer tacker and stapling every three inches across. I planned on just putting an mdf tread & riser that matches the thickness and profile of my false tread for the carpetting. No! Installing carpet isnât that involved an undertaking. Every day at wikiHow, we work hard to give you access to instructions and information that will help you live a better life, whether it's keeping you safer, healthier, or improving your well-being. Plus, the treads make it easier to walk up and down the steps because of the added traction and padding. What's more, a nicely decorated staircase can be the beautiful centrepiece of a home if it's presented in the right way. http://www.diydoctor.org.uk/projects/carpet-stairs.htm, http://www.selfhelpandmore.com/building/flooring/staircase-carpet-runner.php, http://www.diynetwork.com/how-to/skills-and-know-how/carpentry-and-woodworking/how-to-install-a-carpet-runner-on-wooden-stairs, http://www.thisoldhouse.com/toh/how-to/step/0,,20416130_20834952,00.html, consider supporting our work with a contribution to wikiHow. The includes the length, width and height of each stair, as well as the number of stairs itself. Step 2: Apply Tackless Strips. You can only use this technique if your stairs donât have a nosing, which is a tread section that extends past the riser. Should I start at the top or the bottom when carpeting stairs? Support wikiHow by Add a distinctive edge to your steps with the installation of quality stair treads. How do I install a carpet runner on concrete steps? That way, you'll be able to stand firmly on the padding while you're stapling subsequent steps. Could the nails pass through the cables? Cut out your carpet pieces with a utility knife or a carpet knife. You can also use a carpet chisel. Carpet has a particular bearing to the heap, and the heading must run from the highest point of the stairs to the base (not sideways). Should I do the trim around the stairs and wall before having carpet installed? For the tailored Hollywood look, also secure the runner to the underside of the nosing, spacing each staple three inches apart. Then, use a staple gun to attach carpet pad to the treads. These pads should not cover any of the tack strips, however. Carpet runner can, however, be cut and hemmed from any wall-to-wall carpet roll; just know that each side must be stitched with a border to prevent fraying before you start. Saved by Sherry Hasha. The success of every step depends on the success of the one before it, so it's a good idea to take extra special caution in following steps correctly when it comes to laying carpet on stairs. No. If your stairs follow the standard dimensions, it will be much easier to measure and lay your carpet, as carpet runners designed for the standard dimensions will be easy to find. Can I install a temporary carpet over an existing carpet on stairs? Shop for carpet stair treads at Bed Bath & Beyond. To begin, use a utility knife to cut the padding into rectangles that are the same width as the length of each tack strip (to ensure that the padding won’t stick out under the carpet), and three inches longer than the depth of the tread. Then, staple the runner into the crease where the riser and tread meet on either end of the strip as well as each outer edge, two inches from the bottom of the riser. In this case the cap is a piece of carpet installed over the treads and the band is the piece that will cover the risers. Treads are 33" x 11.5" x 2.5". So, you need proper stair treads ideas that will help you creating impressive look inside the house by choosing the right carpet that match with the surroundings. Some people are quick to throw them out, while others like to find practical uses for them. So those on the tread face to the back and those on the riser face "down". Measure and cut the carpet to fit around the tread Attach the carpet with the seam at the back, stapling to the bottom and back of the tread Stretch the carpet around the front of the step, over the top, and push in the tack strip With stairs you want to stretch it into the inner corner of each step. {"smallUrl":"https:\/\/www.wikihow.com\/images\/thumb\/2\/2b\/Carpet-Stairs-Step-1.jpg\/v4-460px-Carpet-Stairs-Step-1.jpg","bigUrl":"\/images\/thumb\/2\/2b\/Carpet-Stairs-Step-1.jpg\/aid1387700-v4-728px-Carpet-Stairs-Step-1.jpg","smallWidth":460,"smallHeight":345,"bigWidth":"728","bigHeight":"546","licensing":"
License: Creative Commons<\/a> License: Creative Commons<\/a> License: Creative Commons<\/a> License: Creative Commons<\/a> License: Creative Commons<\/a> License: Creative Commons<\/a> License: Creative Commons<\/a> License: Creative Commons<\/a> License: Creative Commons<\/a> License: Creative Commons<\/a> License: Creative Commons<\/a> License: Creative Commons<\/a> License: Creative Commons<\/a> License: Creative Commons<\/a> License: Creative Commons<\/a> License: Creative Commons<\/a> License: Creative Commons<\/a> License: Creative Commons<\/a> License: Creative Commons<\/a> License: Creative Commons<\/a>
\n<\/p>
\n<\/p><\/div>"}, {"smallUrl":"https:\/\/www.wikihow.com\/images\/thumb\/0\/0b\/Start-a-Business-As-a-Teenager-Step-1-Version-2.jpg\/v4-460px-Start-a-Business-As-a-Teenager-Step-1-Version-2.jpg","bigUrl":"\/images\/thumb\/0\/0b\/Start-a-Business-As-a-Teenager-Step-1-Version-2.jpg\/aid1387700-v4-728px-Start-a-Business-As-a-Teenager-Step-1-Version-2.jpg","smallWidth":460,"smallHeight":345,"bigWidth":"728","bigHeight":"546","licensing":"
\n<\/p>
\n<\/p><\/div>"}, {"smallUrl":"https:\/\/www.wikihow.com\/images\/thumb\/2\/2f\/Carpet-Stairs-Step-2-Version-2.jpg\/v4-460px-Carpet-Stairs-Step-2-Version-2.jpg","bigUrl":"\/images\/thumb\/2\/2f\/Carpet-Stairs-Step-2-Version-2.jpg\/aid1387700-v4-728px-Carpet-Stairs-Step-2-Version-2.jpg","smallWidth":460,"smallHeight":345,"bigWidth":"728","bigHeight":"546","licensing":"
\n<\/p>
\n<\/p><\/div>"}, {"smallUrl":"https:\/\/www.wikihow.com\/images\/thumb\/5\/59\/Carpet-Stairs-Step-3-Version-2.jpg\/v4-460px-Carpet-Stairs-Step-3-Version-2.jpg","bigUrl":"\/images\/thumb\/5\/59\/Carpet-Stairs-Step-3-Version-2.jpg\/aid1387700-v4-728px-Carpet-Stairs-Step-3-Version-2.jpg","smallWidth":460,"smallHeight":345,"bigWidth":"728","bigHeight":"546","licensing":"
\n<\/p>
\n<\/p><\/div>"}, {"smallUrl":"https:\/\/www.wikihow.com\/images\/thumb\/0\/0b\/Carpet-Stairs-Step-4-Version-2.jpg\/v4-460px-Carpet-Stairs-Step-4-Version-2.jpg","bigUrl":"\/images\/thumb\/0\/0b\/Carpet-Stairs-Step-4-Version-2.jpg\/aid1387700-v4-728px-Carpet-Stairs-Step-4-Version-2.jpg","smallWidth":460,"smallHeight":345,"bigWidth":"728","bigHeight":"546","licensing":"
\n<\/p>
\n<\/p><\/div>"}, {"smallUrl":"https:\/\/www.wikihow.com\/images\/thumb\/e\/e4\/Carpet-Stairs-Step-6-Version-2.jpg\/v4-460px-Carpet-Stairs-Step-6-Version-2.jpg","bigUrl":"\/images\/thumb\/e\/e4\/Carpet-Stairs-Step-6-Version-2.jpg\/aid1387700-v4-728px-Carpet-Stairs-Step-6-Version-2.jpg","smallWidth":460,"smallHeight":345,"bigWidth":"728","bigHeight":"546","licensing":"
\n<\/p>
\n<\/p><\/div>"}, {"smallUrl":"https:\/\/www.wikihow.com\/images\/thumb\/2\/27\/Carpet-Stairs-Step-7-Version-2.jpg\/v4-460px-Carpet-Stairs-Step-7-Version-2.jpg","bigUrl":"\/images\/thumb\/2\/27\/Carpet-Stairs-Step-7-Version-2.jpg\/aid1387700-v4-728px-Carpet-Stairs-Step-7-Version-2.jpg","smallWidth":460,"smallHeight":345,"bigWidth":"728","bigHeight":"546","licensing":"
\n<\/p>
\n<\/p><\/div>"}, {"smallUrl":"https:\/\/www.wikihow.com\/images\/thumb\/e\/e0\/Carpet-Stairs-Step-8-Version-2.jpg\/v4-460px-Carpet-Stairs-Step-8-Version-2.jpg","bigUrl":"\/images\/thumb\/e\/e0\/Carpet-Stairs-Step-8-Version-2.jpg\/aid1387700-v4-728px-Carpet-Stairs-Step-8-Version-2.jpg","smallWidth":460,"smallHeight":345,"bigWidth":"728","bigHeight":"546","licensing":"
\n<\/p>
\n<\/p><\/div>"}, {"smallUrl":"https:\/\/www.wikihow.com\/images\/thumb\/f\/fc\/Carpet-Stairs-Step-9-Version-2.jpg\/v4-460px-Carpet-Stairs-Step-9-Version-2.jpg","bigUrl":"\/images\/thumb\/f\/fc\/Carpet-Stairs-Step-9-Version-2.jpg\/aid1387700-v4-728px-Carpet-Stairs-Step-9-Version-2.jpg","smallWidth":460,"smallHeight":345,"bigWidth":"728","bigHeight":"546","licensing":"
\n<\/p>
\n<\/p><\/div>"}, {"smallUrl":"https:\/\/www.wikihow.com\/images\/thumb\/a\/aa\/Carpet-Stairs-Step-10-Version-2.jpg\/v4-460px-Carpet-Stairs-Step-10-Version-2.jpg","bigUrl":"\/images\/thumb\/a\/aa\/Carpet-Stairs-Step-10-Version-2.jpg\/aid1387700-v4-728px-Carpet-Stairs-Step-10-Version-2.jpg","smallWidth":460,"smallHeight":345,"bigWidth":"728","bigHeight":"546","licensing":"
\n<\/p>
\n<\/p><\/div>"}, {"smallUrl":"https:\/\/www.wikihow.com\/images\/thumb\/f\/f0\/Carpet-Stairs-Step-11-Version-2.jpg\/v4-460px-Carpet-Stairs-Step-11-Version-2.jpg","bigUrl":"\/images\/thumb\/f\/f0\/Carpet-Stairs-Step-11-Version-2.jpg\/aid1387700-v4-728px-Carpet-Stairs-Step-11-Version-2.jpg","smallWidth":460,"smallHeight":345,"bigWidth":"728","bigHeight":"546","licensing":"
\n<\/p>
\n<\/p><\/div>"}, {"smallUrl":"https:\/\/www.wikihow.com\/images\/thumb\/a\/ae\/Carpet-Stairs-Step-12-Version-2.jpg\/v4-460px-Carpet-Stairs-Step-12-Version-2.jpg","bigUrl":"\/images\/thumb\/a\/ae\/Carpet-Stairs-Step-12-Version-2.jpg\/aid1387700-v4-728px-Carpet-Stairs-Step-12-Version-2.jpg","smallWidth":460,"smallHeight":345,"bigWidth":"728","bigHeight":"546","licensing":"
\n<\/p>
\n<\/p><\/div>"}, {"smallUrl":"https:\/\/www.wikihow.com\/images\/thumb\/7\/71\/Carpet-Stairs-Step-13-Version-2.jpg\/v4-460px-Carpet-Stairs-Step-13-Version-2.jpg","bigUrl":"\/images\/thumb\/7\/71\/Carpet-Stairs-Step-13-Version-2.jpg\/aid1387700-v4-728px-Carpet-Stairs-Step-13-Version-2.jpg","smallWidth":460,"smallHeight":345,"bigWidth":"728","bigHeight":"546","licensing":"
\n<\/p>
\n<\/p><\/div>"}, {"smallUrl":"https:\/\/www.wikihow.com\/images\/thumb\/f\/f5\/Carpet-Stairs-Step-14-Version-2.jpg\/v4-460px-Carpet-Stairs-Step-14-Version-2.jpg","bigUrl":"\/images\/thumb\/f\/f5\/Carpet-Stairs-Step-14-Version-2.jpg\/aid1387700-v4-728px-Carpet-Stairs-Step-14-Version-2.jpg","smallWidth":460,"smallHeight":345,"bigWidth":"728","bigHeight":"546","licensing":"
\n<\/p>
\n<\/p><\/div>"}, {"smallUrl":"https:\/\/www.wikihow.com\/images\/thumb\/7\/79\/Carpet-Stairs-Step-15-Version-2.jpg\/v4-460px-Carpet-Stairs-Step-15-Version-2.jpg","bigUrl":"\/images\/thumb\/7\/79\/Carpet-Stairs-Step-15-Version-2.jpg\/aid1387700-v4-728px-Carpet-Stairs-Step-15-Version-2.jpg","smallWidth":460,"smallHeight":345,"bigWidth":"728","bigHeight":"546","licensing":"
\n<\/p>
\n<\/p><\/div>"}, {"smallUrl":"https:\/\/www.wikihow.com\/images\/thumb\/6\/6b\/Carpet-Stairs-Step-17-Version-2.jpg\/v4-460px-Carpet-Stairs-Step-17-Version-2.jpg","bigUrl":"\/images\/thumb\/6\/6b\/Carpet-Stairs-Step-17-Version-2.jpg\/aid1387700-v4-728px-Carpet-Stairs-Step-17-Version-2.jpg","smallWidth":460,"smallHeight":345,"bigWidth":"728","bigHeight":"546","licensing":"
\n<\/p>
\n<\/p><\/div>"}, {"smallUrl":"https:\/\/www.wikihow.com\/images\/thumb\/a\/a5\/Carpet-Stairs-Step-18-Version-2.jpg\/v4-460px-Carpet-Stairs-Step-18-Version-2.jpg","bigUrl":"\/images\/thumb\/a\/a5\/Carpet-Stairs-Step-18-Version-2.jpg\/aid1387700-v4-728px-Carpet-Stairs-Step-18-Version-2.jpg","smallWidth":460,"smallHeight":345,"bigWidth":"728","bigHeight":"546","licensing":"
\n<\/p>
\n<\/p><\/div>"}, {"smallUrl":"https:\/\/www.wikihow.com\/images\/thumb\/5\/50\/Carpet-Stairs-Step-22-Version-2.jpg\/v4-460px-Carpet-Stairs-Step-22-Version-2.jpg","bigUrl":"\/images\/thumb\/5\/50\/Carpet-Stairs-Step-22-Version-2.jpg\/aid1387700-v4-728px-Carpet-Stairs-Step-22-Version-2.jpg","smallWidth":460,"smallHeight":345,"bigWidth":"728","bigHeight":"546","licensing":"
\n<\/p>
\n<\/p><\/div>"}, {"smallUrl":"https:\/\/www.wikihow.com\/images\/thumb\/6\/69\/Carpet-Stairs-Step-23-Version-2.jpg\/v4-460px-Carpet-Stairs-Step-23-Version-2.jpg","bigUrl":"\/images\/thumb\/6\/69\/Carpet-Stairs-Step-23-Version-2.jpg\/aid1387700-v4-728px-Carpet-Stairs-Step-23-Version-2.jpg","smallWidth":460,"smallHeight":345,"bigWidth":"728","bigHeight":"546","licensing":"
\n<\/p>
\n<\/p><\/div>"}, {"smallUrl":"https:\/\/www.wikihow.com\/images\/thumb\/1\/18\/Carpet-Stairs-Step-24-Version-2.jpg\/v4-460px-Carpet-Stairs-Step-24-Version-2.jpg","bigUrl":"\/images\/thumb\/1\/18\/Carpet-Stairs-Step-24-Version-2.jpg\/aid1387700-v4-728px-Carpet-Stairs-Step-24-Version-2.jpg","smallWidth":460,"smallHeight":345,"bigWidth":"728","bigHeight":"546","licensing":"
\n<\/p>
\n<\/p><\/div>"}, {"smallUrl":"https:\/\/www.wikihow.com\/images\/thumb\/3\/36\/Carpet-Stairs-Step-26-Version-2.jpg\/v4-460px-Carpet-Stairs-Step-26-Version-2.jpg","bigUrl":"\/images\/thumb\/3\/36\/Carpet-Stairs-Step-26-Version-2.jpg\/aid1387700-v4-728px-Carpet-Stairs-Step-26-Version-2.jpg","smallWidth":460,"smallHeight":345,"bigWidth":"728","bigHeight":"546","licensing":"You May Also Like

Potřebujete noční stolek nebo si vystačíte s kompromisem?
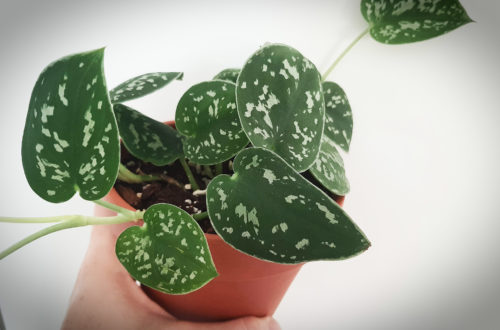
Šplhavnice | Potos | Epipremnum Scindapsus “Pictus Trebie” | Satin Pothos
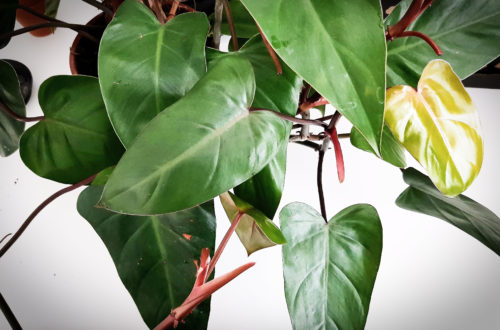
Filodendron | Philodendron “Red Emerald”
